Add a Battery Wiring Diagram
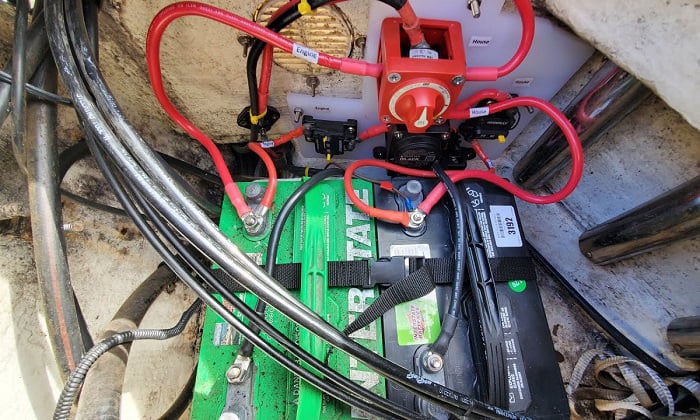
To add a battery wiring diagram, start by connecting the ground of the fuse boxes and the positive bus bar. Next, connect the always-on fuse box to the positive bus bar and the positive of the outboard motor to the positive bus bar.
Change the connections of the water pump and connect it to the house battery. Finally, demonstrate the process and show how the outboard engine charges the house battery. This is a basic boat dual battery wiring technique that ensures efficient battery usage.
For more detailed instructions and visuals, you can refer to online resources and videos on platforms like YouTube and Blue Sea Systems.
1. Understanding Battery Wiring Basics
Understanding battery wiring basics is essential for any system installation. It is important to differentiate between battery wiring and battery management. Proper battery wiring plays a crucial role in the smooth functioning of the system. And a wiring diagram is significant in ensuring the correct installation of batteries.
It provides a visual representation of the connections, making it easier to understand and follow. By following a wiring diagram, you can avoid errors or confusion during the installation process. So, whether you are installing batteries in a boat, RV, or any other system, adding a battery wiring diagram is a smart move.
It ensures a well-organized and efficient battery setup, improving the overall performance of the system.
2. Components Of A Battery Wiring Diagram
A battery wiring diagram includes various components that are essential for its proper functioning. One such component is the battery terminals and connections, which allow for the flow of electricity. Another important element is the fuse distribution blocks, which serve the purpose of protecting the circuit from overloads.
Additionally, switch types play a crucial role in a wiring diagram as they determine the functions and control the flow of electricity. Understanding the different elements included in a battery wiring diagram is crucial for ensuring the safety and efficiency of the electrical system.
By following the proper wiring diagram, you can easily add a battery and enhance the performance of your electrical system.
3. Step-By-Step Guide To Adding A Battery Wiring Diagram
Are you looking to add a battery wiring diagram to your existing setup? This step-by-step guide will walk you through the process, starting with gathering the necessary materials and tools. You’ll need essential materials like wires, connectors, and a wiring diagram template.
Once you have everything you need, it’s time to understand your current battery system. Assess the setup and configuration, identifying any potential issues or areas for improvement. Next, create a detailed wiring diagram that maps out the connections and components for optimal design.
With the diagram complete, it’s time to install it. Make the necessary electrical connections and secure the wiring diagram components properly. Don’t forget to test the functionality of the wiring diagram once it’s installed. Finally, troubleshoot any common issues that may arise and learn techniques for optimal performance.
With these steps, you’ll be able to add a battery wiring diagram successfully.
Credit: www.boatingbasicsonline.com
Frequently Asked Questions For Add A Battery Wiring Diagram
How Does Add A Battery Work?
An add a battery system works by using a Dual Circuit Plus Battery Switch and an Automatic Charging Relay to simplify switching and automate charging. When you arrive, you turn the battery switch ON, and when you leave, you turn it OFF.
How Do You Wire Up A Battery?
To wire up a battery, follow these steps: 1. Connect the positive terminal of the battery to the corresponding positive terminal of the device or circuit you want to power. 2. Connect the negative terminal of the battery to the corresponding negative terminal of the device or circuit you want to power.
3. Make sure the connections are secure and tight to ensure proper functioning. 4. Test the battery and device to ensure they are working correctly.
How Do I Add A Second Battery To My Boat?
To add a second battery to your boat, follow these steps: 1. Install a dual circuit plus battery switch and an automatic charging relay. 2. Connect the ground of the fuse boxes and the positive bus bar. 3. Connect the positive of the outboard motor to the positive of the bus bar.
4. Change the connections of the water pump and connect it to the house battery. 5. Demonstrate and test the connections. 6. Your outboard engine will now charge the house battery.
How Does Blue Sea Add A Battery Work?
The Blue Sea Add-A-Battery includes a Dual Circuit Plus Battery Switch and an Automatic Charging Relay. Simply turn the battery switch ON when you arrive and OFF when you leave.
Conclusion
Adding a battery wiring diagram to your blog post has numerous benefits. It provides a visual representation of the connections and components involved, making it easier for readers to understand and follow along. It ensures that the wiring is done correctly, preventing any potential safety hazards or damage to the electrical system.
Furthermore, it allows for easy troubleshooting and maintenance in the future. With the help of a battery wiring diagram, you can easily identify any faulty connections or components and address them promptly. Whether you are a beginner or an experienced DIYer, having a battery wiring diagram is essential for any boat or automotive enthusiast.
It simplifies the process and ensures that your electrical system functions optimally. So, don’t forget to include a battery wiring diagram in your next project for a smoother and more efficient setup. Happy wiring!